Sunday, April 27, 2014

Wood Bead Curtain (DIY)

This wood bead curtain is very easy to make. Design the wood beads the way you like it.
Decor your room with your very own hand-made curtain out of different stash from your old crafts. This is just an example, the materials that I used are new ones. I like this much because of colorful designs. It makes the ambiance more earthy and calm. Try making your own design.
Process: Stringing


Like and Share This Post:

Saturday, April 26, 2014

My Beads. My Hobby


I love beads! Despite my busy schedule, I'm still visiting this hobby once in a while. Believe me, this will lessen your stress. There's no standard. You can create whatever you want. It doesn't limit your creativity but boosting up your imagination instead. The materials don't have to be new. We have lots of stash at home which you can use like your old shirts and button :) Start with simple designs first like earrings and bracelets. There are many tutorials and how-to-videos available online FREE. I will also be uploading some of the basics, so stay tuned :)


Like and Share This Post:

Sunday, April 20, 2014

The Papaya (Papaw or Pawpaw) Plant

The papaya is a large, tree-like plant, with a single stem growing from 5 to 10 m (16 to 33 ft) tall, with spirally arranged leaves confined to the top of the trunk. The lower trunk is conspicuously scarred where leaves and fruit were borne. The leaves are large, 50–70 cm (20–28 in) indiameter, deeply palmately lobed, with seven lobes. Unusually for such large plants, the trees are dioecious. The tree is usually unbranched, unless lopped. The flowers are similar in shape to the flowers of the Plumeria, but are much smaller and wax-like. They appear on the axils of the leaves, maturing into large fruit - 15–45 cm (5.9–17.7 in) long and 10–30 cm (3.9–11.8 in) in diameter. The fruit is ripe when it feels soft (as soft as a ripe avocado or a bit softer) and its skin has attained an amber to orange hue. To know more: 
Please read: http://en.wikipedia.org/wiki/Papaya

Deliciously sweet with musky undertones and a soft, butter-like consistency, it is no wonder the papaya was reputably called the "fruit of the angels" by Christopher Columbus. Once considered quite exotic, they can now be found in markets throughout the year. Although there is a slight seasonal peak in early summer and fall, papaya trees produce fruit year round.

Papayas are spherical or pear-shaped fruits that can be as long as 20 inches. The ones commonly found in the market usually average about 7 inches and weigh about one pound. Their flesh is a rich orange color with either yellow or pink hues. Inside the inner cavity of the fruit are black, round seeds encased in a gelatinous-like substance. Papaya's seeds are edible, although their peppery flavor is somewhat bitter. The fruit, as well as the other parts of the papaya tree, contain papain, an enzyme that helps digest proteins. This enzyme is especially concentrated in the fruit when it is unripe. Papain is extracted to make digestive enzyme dietary supplements and is also used as an ingredient in some chewing gums. 
You can visit to read more about the benefits of papaya.
http://www.whfoods.com/genpage.php?tname=foodspice&dbid=47

I also plant papaya fruit in our backyard. I never expect that it will grow in  a limited soil. Well, better than in one small pot :) For few months, I can harvest fresh papaya for my "Tinola" dish, which is one of Manny "Pacman" Pacquiao's favorite food before his fight :). The fruits grow fast and now I could harvest ripe fruits. I collect the seeds for re-planting. You can try it yourself!


Like and Share This Post:

Saturday, April 19, 2014

Make Your Hair Band and Earrings Set

Test your creativity. Make your own set of accessories. Remember that this is just an illustration and you can explore and create your own using any available materials. Consider recycling :)


Like and Share This Post:

Friday, April 18, 2014

How To Make Kangkong (Watercress) Burger

Ipomoea aquatica

Ipomoea aquatica is a semiaquatictropical plant grown as a vegetable for its tender shoots and leaves. It is found throughout the tropical and subtropical regions of the world, although it is not known where it originated. This plant is known in English as water spinachriver spinach,[1]water morning glorywater convolvulus, or by the more ambiguous names Chinese spinachChinese convolvulusswamp cabbage orkangkong in Southeast Asia.[2] Occasionally, it has also been mistakenly called "kale" in English, although kale is a strain of mustard belonging to the species Brassica oleracea 

In the Philippines, where it is called kangkóng, the tender shoots are cut into segments and cooked, together with the leaves, in fish and meat stews, such as sinigang. The vegetable may also be eaten alone, such as in adobong kangkóng, where it is sautéed in cooking oil, onions, garlic,vinegarsoy sauce, and bouillon cube. A local appetiser called crispy kangkóng has the leaves coated in a flour-based batter and fried until crisp, similar to Japanese vegetable tempura.[10]
http://en.wikipedia.org/wiki/Ipomoea_aquatica

I have here my version of a very simple but nutritious budget meal.


INGREDIENTS:

  • 2 bundles of fresh kangkong leaves (watercress)
  • half cup of flour
  • 1 pc medium sized egg
  • 1 teaspoon salt
  • pinch of pepper
  • 1 medium sixed onion
  • 3cloves garlic


PROCEDURE:

  • Wash the kangkong leaves (water cress) and roughly chop it about half inch long.
  • Chop the onion and garlic. Put them in a bowl and mix them together until combined.
  • You can include small amount of ketchup, worcestershire sauce, and pepper to add additional flavor to the vegetable.
  • Season one egg yolk with salt. You can put an optional ingredient like meat powder or broth cubes.
  • Add the flour and mix everything together. It is easier to start mixing with a spoon; then use your clean hands to thoroughly combine the ingredients.
  • Leave for about 15minutes.
  • Make an individual round-shaped burgers.
  • Fry it on low heat.

Optional, you can fry one large sized instead and cut into regular-sized burgers.

Enjoy!!!


Like and Share This Post:

How to Make an Ice Candy / Ice Candies


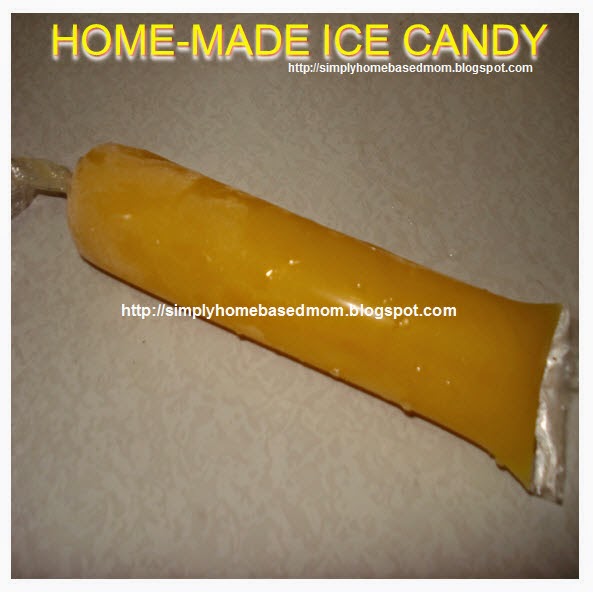
Make your very own ice candy for your family and neighborhood. It's quote easy and very economical because the ingredients to be used are not too expensive and readily available at the nearest sari-sari store or public market near you. Of course, you can always bring your ice candy to the next level if you wish to convert it into halo-halo like version as one of the Filipino Delights during summer :)  The process of making this cool delight is just a matter of mixing its components. So follow these easy steps. Try it for your family and you also can sell ice candies to your neighbors in which most kids will surely love!


In making the ice candies, consider 100% cleanliness. The preparation area must be cleaned and free from all sorts of dirt and bacteria. I cook the ingredients and let it cool before putting in into the freezer. This way, the food that you will serve is very safe even to toddlers.


You can explore the flavors, chocolate (cocoa or milo/other brands), orange, mango, grapes where u can use the fresh fruits or blend it with instant juices like Tang or Eight o'clock.


Example Flavor: Chocolate Ice Candy(ies)

  • 1 standard casserole of water approx 6L
  • 1 big condensed milk
  • 1/4 kilo cocoa or you can convert into Milo or Ovaltine (more expensive) 
  • 1 kilo brown sugar
  • 50+ pcs. Ice candy cellophane “Ice Candy wrapper”
  • 1/4 kilo of flour for thickening purposes
How to Make the Chocolate Ice Candy(ies)
  • Boil the water in casserole. 
  • In separate bowl, mix the cocoa powder (note: Use hot water), don't put it yet into the caserole.
  • Mix the thickening flour in separate bowl (note: use cold water).
  • Put the brown sugar into the boiling water.
  • Stir continuously while boiling.
  • Add the mixed flour and cocoa to the boiling water in caserole.
  • On low heat, add the condensed milk, it may overflow.
  • Taste it. you may more ingredients if needed depending on your taste.
  • Let it cool before packaging.
Packaging the Ice Candy(ies)
  • Prepare your ice candy wrapper, funnel, and a ladle.
  • Insert the tip of the funnel  in cellophane and hold tight.
  • Ladle ice candy mixture into the cellophane leaving at least 2 inches for sealing or the size of your ice candy is approx 4.5 ~ 5 inches long.
  • Twist the cellophane to seal the mixture and knot tightly.
  • Repeat the same procedure until all wrapped.
  • Freeze ice candy overnight before serving.
Enjoy!!!
You can now serve it for free taste. If you want to sell it, per piece is 2-3 pesos. You can calculate all of your ingredients used and divide it with how many pcs total did you make?
That's how you will visualize your profit. Go mommies, while the weather is hot, we can make cold cash here. Good luck :)


Like and Share This Post: